Edited to add cost for supplies and a few more linkies.
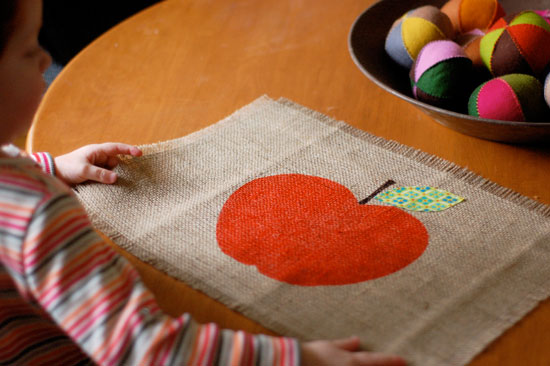
Recently, a friend recommended a site called Tipnut. The site is just slam packed with fun things to make and do and create. While checking it out I came across possibly the cutest placemats ever over at bloesem kids. Here are those adorable placemats:
They are made from burlap and freezer paper. I knew I had to try it.
Now, I’ll fully admit I’m probably way behind on this freezer paper stenciling thing. I spent most of the creativity I had the last 5 years on teaching and working with kids in the classroom. I’ve missed out, but oh man am I going to catch up, so when burlap went on sale 2 weeks ago at Joann’s, I snagged a yard and promised myself I’d make some. I had a coupon so I went ahead and bought the textile paint I would need as well. Here’s what I did:
First, I chose the size of my placemats and made a template. I chose 15×15 squares because we have a small round table and four rectangle placemats tend to overlap more than I’d like.
I used a black marker to make a dashed outline around my template to make it easier to cut out.
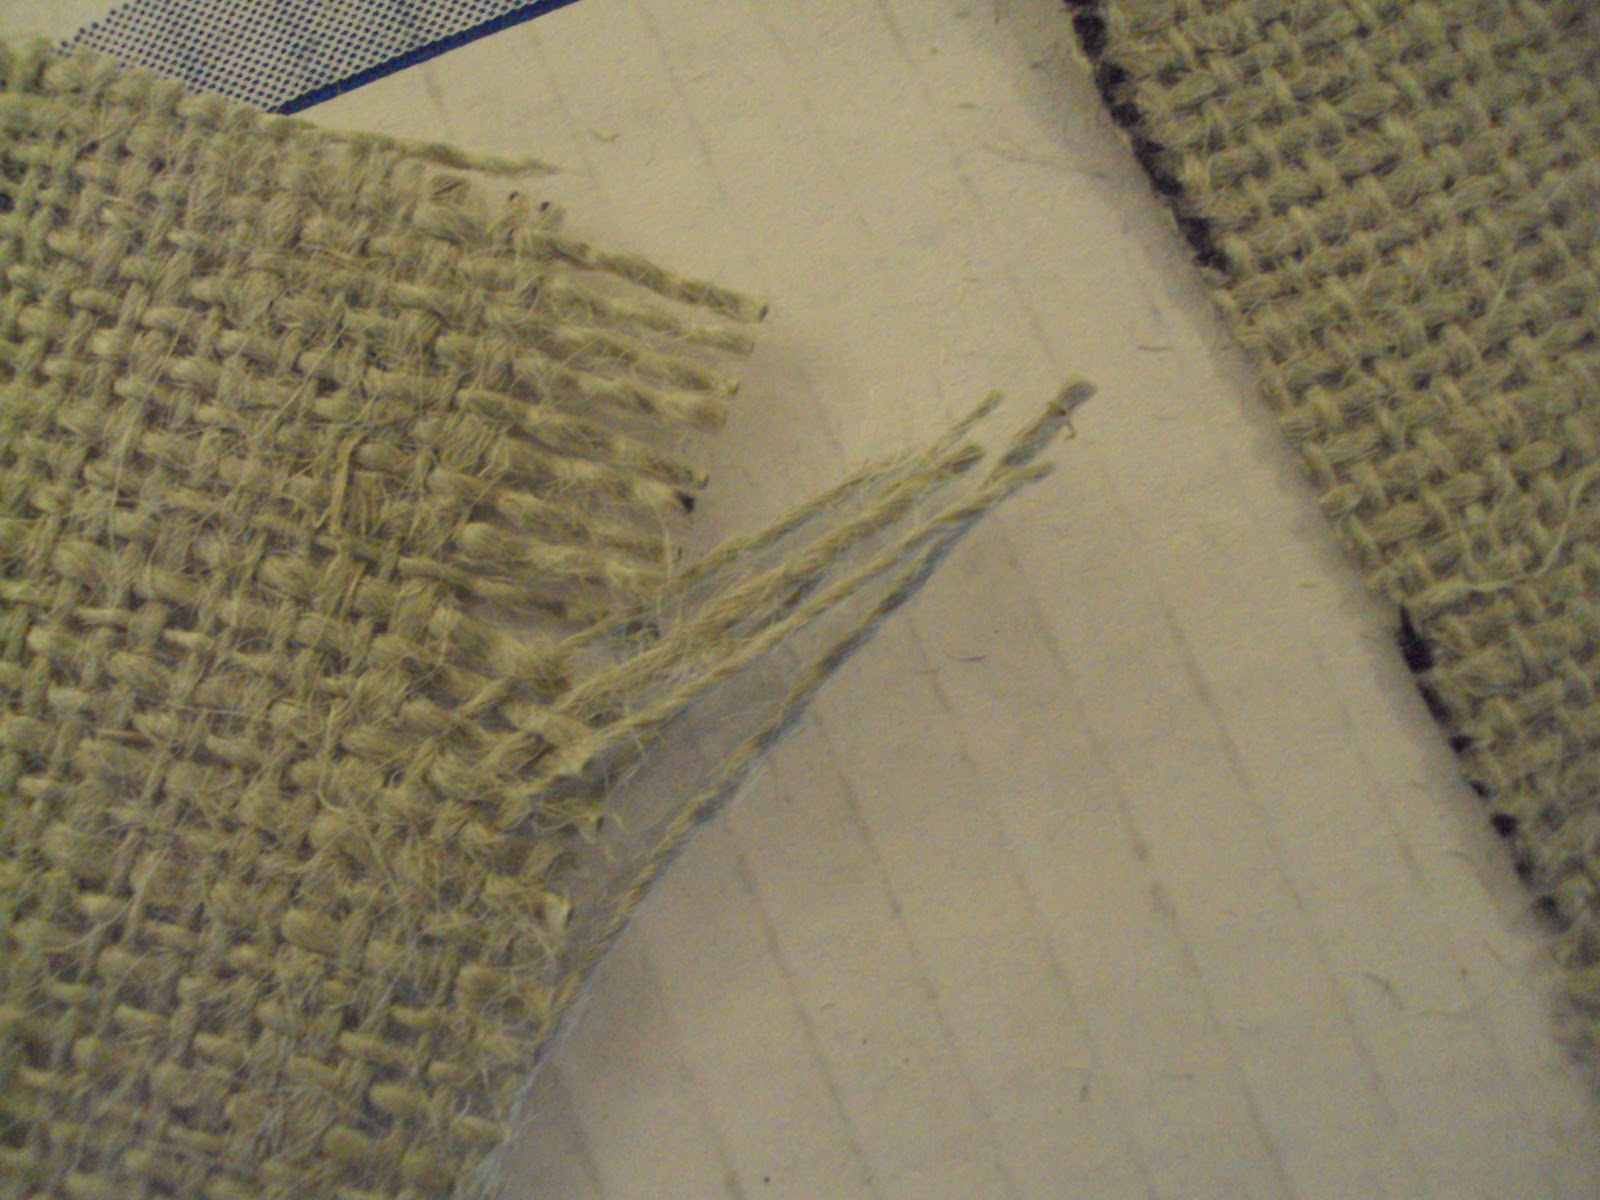
Then I cut them out carefully and removed 5 or 6 strands of the burlap from each side. I’d recommend that you cut inside the selvage edge on the burlap since you won’t be able to pull strands to make your border otherwise.
Also, it won’t really be 5 or 6 equal long strands of burlap. It’s not easy to cut the burlap evenly (for me at least) so you’ll probably have some small strands that pop off too. No worries.
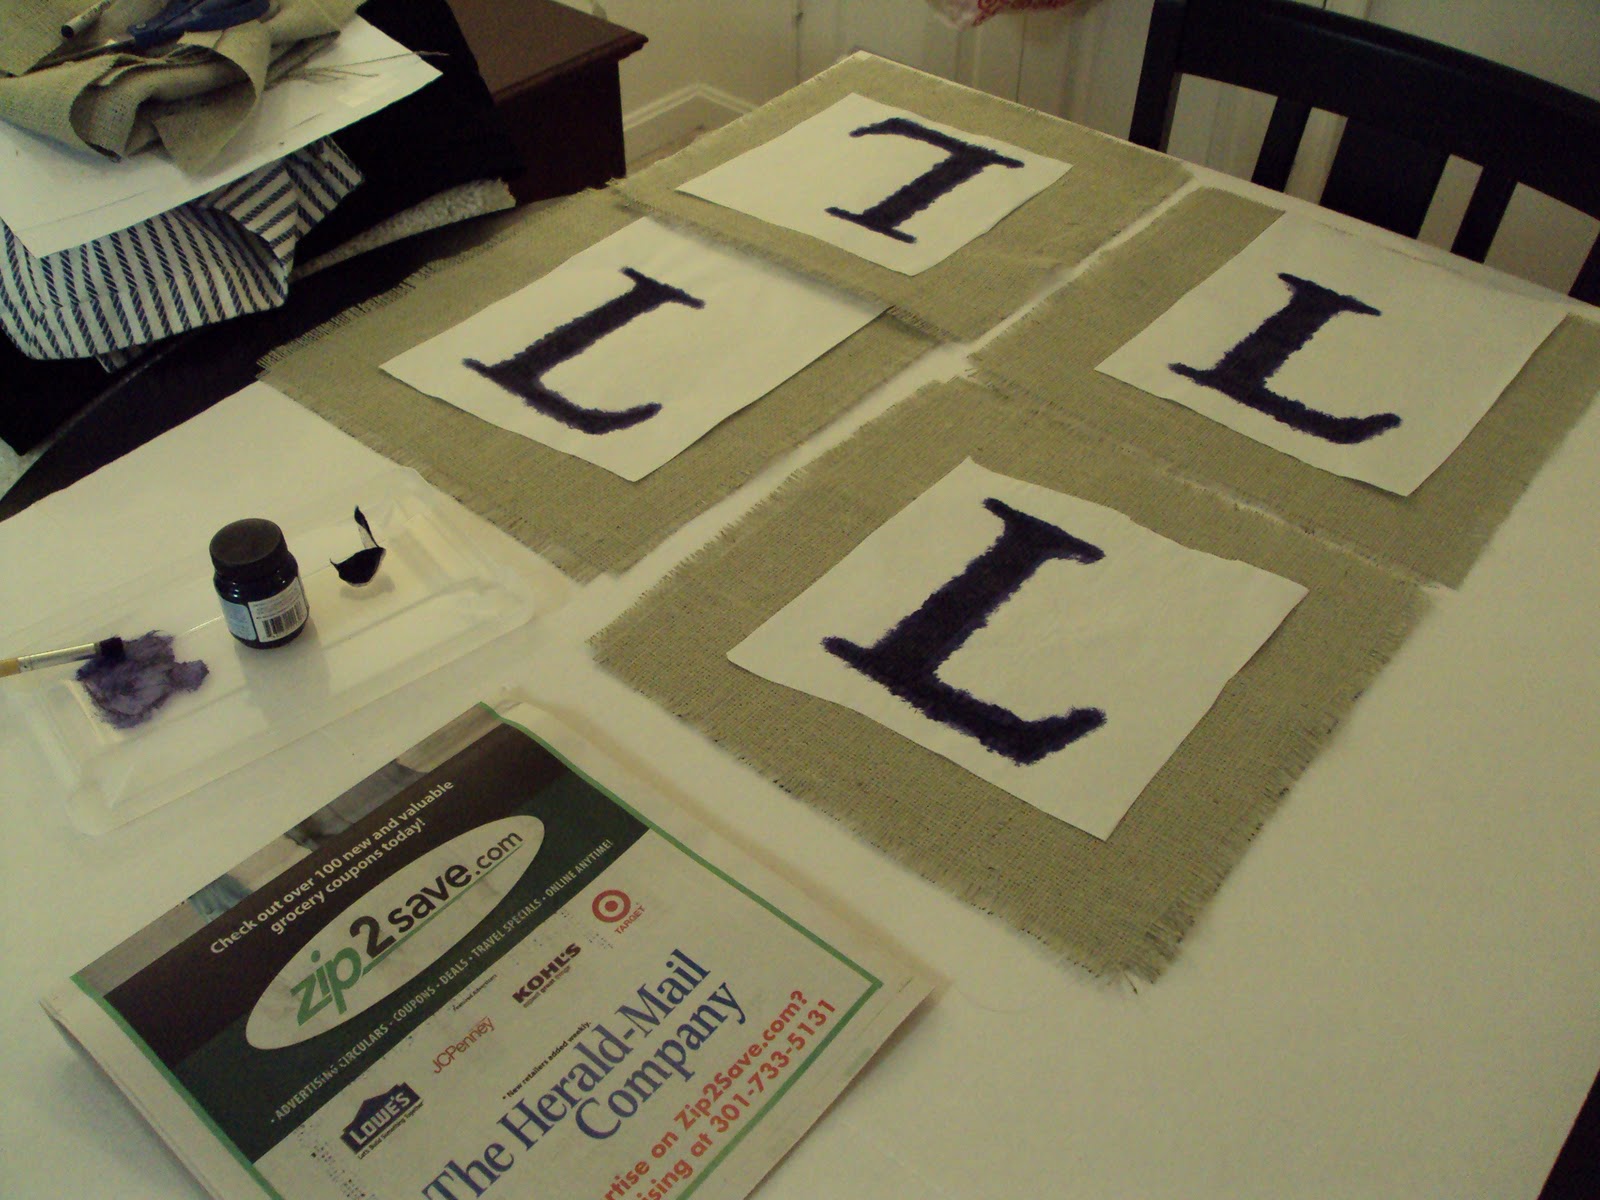
Next I made my template. I wanted our placemats to look natural and rustic, but somewhat classy with a monogram. I used Microsoft Word and chose the first initial of our last name “L” and used a font size setting of 800 to blow it up. I printed it out and attached it and the freezer paper to my Fiskars self healing cutting mat plastic side down. I secured them with a binder clip and then went at it with my x-acto knife.
Scrappy’s Quick Tip: The reason I laid the freezer paper plastic side down is because my design was directional. When you iron the freezer paper to your fabric you do it plastic side down and you need to make sure your design is in the right direction while cutting out your template.
Then I ironed the freezer paper templates to each placemat. I made 4 – one for each placemat. I followed the directions on the Reynold’s Freeze Paper package and made sure I had a paper bag in between the iron and the freezer paper.
I used Jacquard Textile paint in a navy blue color and applied it with a stencil brush, but if you want fuller coverage I’d use a sponge brush or some other brush. Mine came out rustic which is what I wanted, but it’s not full coverage.
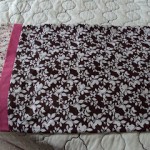
Here’s what they look like completed:
After I let them completely dry and removed the freezer paper (a must – let your paint fully dry before removing stencil) I flipped them paint side down and heat sealed the paint with a screaming hot iron. These placemats will be spot clean only, but considering the whole project cost me less than $20.00, I’m not worried about it.
Total Cost for supplies:
Burlap $3.99
Fabric Paint $5.29
Freezer Paper $3.50
The picture doesn’t do it justice. My camera SD card was on the fritz so I used my cell phone. I’ll post all 4 laid out on the table with a few other natural elements for spring soon.
Have you tried this technique? If you have, and you’ve blogged about it, add your link in the comments section. 🙂
Linked up to the following parties (Will add buttons ASAP, it’s 3:15 AM where I am, bedtime!):
Meet Up Monday @ The House Creative
Show Me What Ya Got Tuesday @ Not JUST A Housewife
Hey, I am coming over from the link posted on I’m An Organizing Junkie. I am currently a stay-at-home mom…on mat leave for my first child and also a teacher!! I am hoping to start crafting a lot more as I get the hang of having a baby and plan to visit you here a lot more often as well. If you have a minute check out my blog!
We use cookies to ensure that we give you the best experience on our website. If you continue to use this site we will assume that you are happy with it.OkRead more


10 Comments
I have not tried this method yet, but you’ve convinced me! Love the placemats!
Wow, you did a great job!!
Hey, I am coming over from the link posted on I’m An Organizing Junkie. I am currently a stay-at-home mom…on mat leave for my first child and also a teacher!! I am hoping to start crafting a lot more as I get the hang of having a baby and plan to visit you here a lot more often as well.
If you have a minute check out my blog!
All the work seems to pay off, because they look great!
Those look amazing!!
verrry cute! I am totally behind on this trend too…oh well! Yours look great 🙂
Thanks so much for linking to “20 Below Thursday”! 🙂
Thank you for linking this up to WHASSUP WEDNESDAY!
Hope to see you next Wednesday:)
xoxokara
What a great idea! Thanks so much for linking this up to our Wicked Awesome Wednesday link party!
Have not tried this type of stenciling either but will let you know if I do. Your placemats turned out great! Thanks for the tutorial!
-caroline
http://cwfrosting.blogspot.com
Thanks for sharing your ideas and thoughts, i like your blog and bookmark this blog for further use thanks again…
Freezers